Everyday I see more and more sensitive information being saved in places where security is wide open. Credit Cards, Intellectual Property, Social Security Numbers, Private Certificates - you name it - I have seen it. So I wanted to build on a series of recent posts to demonstrate how PowerShell can be used to help secure sensitive files. In this workflow we will identify sensitive files using the DataGravity Discovery system, secure them with PowerShell, and validate our updates.
THE WORKFLOW
- Identify files containing sensitive data with DataGravity and export files names. (CSV format)
- Run the ChangeFilePermissions.ps1 PowerShell script
- Validate Permission Changes and restore original permissions if required.
Identify Sensitive DAta
In earlier posts I have highlighted easy ways to find sensitive data using the DataGravity search and dynamic tagging. An example of these sensitive tags are social security numbers lurking in unsecured files. The simple search below returns this list of files residing on a public share.

We can export this information out to a CSV file and use it as an input parameter in then next step.

THE SCRIPT
The full ChangePermissions PowerShell script is available on my Powershell repo on GitHub. Let's look at an example of how to run it:
ChangeFilePermissions.ps1 -ShareFilePath "\\CorporateDrive\Public" -csvFilePath "c:\temp\public.csv" -SensitiveTag "SS" -logFile "C:\Temp\FilesPermissionChanges.log
Script parameters:
-ShareFilePath is the path to share where the files containing sensitive data live. In our example it is the public share.
-csvFilePath is the path to the exported CSV listing all files, including those that contain sensitive information. This is an export from a DataGravity search.
-SensitiveTag the sensitive tag(s) to look for when selecting which files to secure (Ex. SS, CC, Email Address, etc.)
-logFile is an optional location for where we want to log the activity of what files have been secured.
Securing Files with Sensitive Data
It is very important to place emphasis on the fact that when dealing with automation and the modification of security permissions for anything we must BE CAREFUL and be sure to have our UNDO button handy. Remember that just as fast as you can automate a process, you can equally as fast have a royal mess on your hands. Check out my UNDO button later in the post.
In the example below, we are running the ChangeFilePermissions.ps1 script against the public folder to deny access to all files that containing social security numbers. The script can be modified to include other sensitive tags or a combination of tags.

We secured 30 files on the share by changing their security access. This is validated by looking at the activity timeline within DataGravity, which confirms that the 'set ACL' operation was performed on the files.

VALIDATE SECURITY
We can also validate the security of the files was updated by attempting to access one of the files and verifying that we no longer have permission to view the file. This is validated by: i) output log from the script ii) security tab of the file properties.

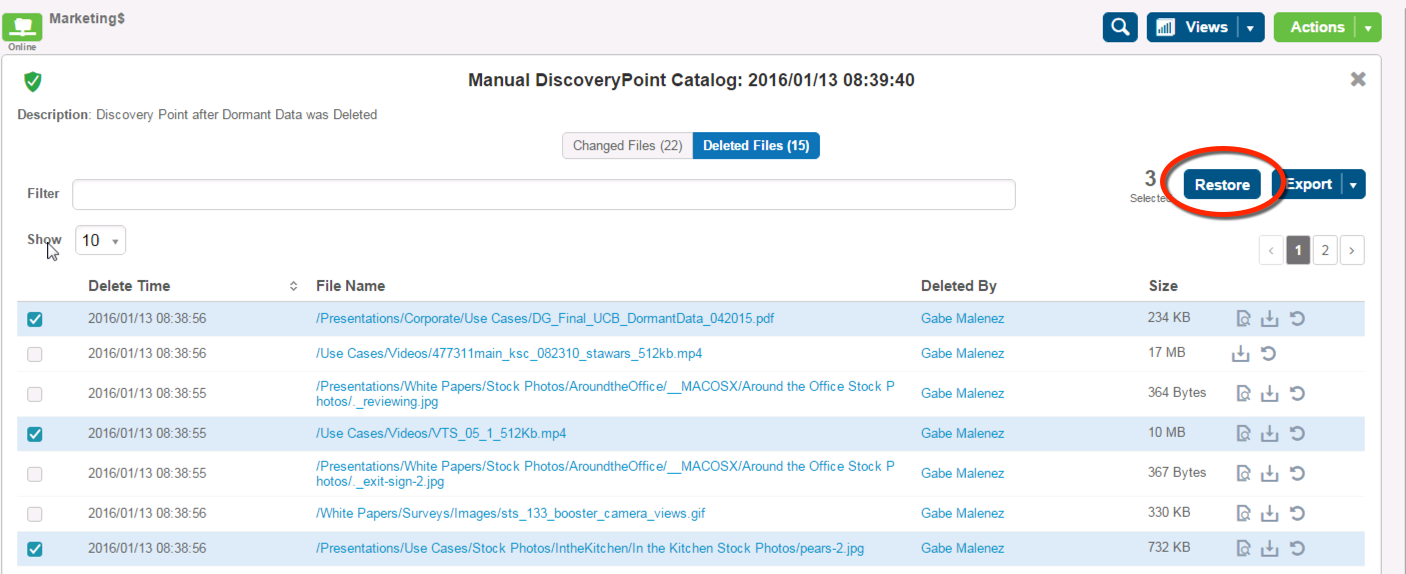
The UNDO Button
I personally always like to have a back out plan when making large amounts of changes - after all who doesn't like and UNDO button? DataGravity's Discovery Points work very well as my UNDO button and therefore I recommend creating a manual one before running the script.

This gives us the ability to restore any or all of the modified files to their original security settings. You can see that it is easy to view previous versions for any file and restore if needed, including the original permissions.


I hope you find this walkthrough and script valuable to making your environment more secure.