Deploying Packer Images with Dynamic Secrets from HashiCorp Vault

Using Packer to automate the build process for machine images is awesome. In fact I have found great success in automating image builds across many environments including VMware, AWS, Azure & GCP, but one thing has always been a bit of a concern for me…..storing the credentials. Of course each environment requires a different set of credentials and to easily access them I typically store them as environment variables or within a local file on my computer. In fact, doing something like this for my AWS deployments has been the norm.

$ export AWS_ACCESS_KEY_ID="awsaccesskey"
$ export AWS_SECRET_ACCESS_KEY="awssecretkey"

A better way

As the number of environments and set of credentials has been growing, I have found a need for storing and accessing them in a better way. Ideally I am looking to store credentials in a central location, look them up when needed for deployment and rotate them when done with the job at hand. I would like the ability to create a set of rotating credentials that can be called and used within my Packer automation workflows.

Enter Vault

HashiCorp, the creators of Packer, also have a secrets management product called Vault. Vault secures, stores, and tightly controls access to tokens, passwords, certificates, API keys, and other secrets in modern computing. Vault supports my idea of rotating credentials or as they call them ‘dynamic secrets’ to minimize the length of time a set of credentials should exist. Vault supports a number of secrets engines to ease integration including AWS, Azure, GCP, Databases and Active Directory. (There are a ton of other engines available, but these will get me started).

In this case, we will utilize Vault’s AWS secrets engine to generate dynamic, on-demand AWS access credentials for my Packer AMI builds.

Enabling The AWS Secrets Engine in Vault

The AWS secrets engine can be enabled via the Vault command line our UI. Below is a quick video capturing the steps using the UI.

vault_packer_awsengine.gif
  1. Enable the AWS Secrets Engine

  2. Configure the AWS Secrets Engine by providing AWS credentials that provide Vault the ability to dynamically manage IAM Users.

  3. Create a ‘Packer’ role and specify the minimum set of permissions Packer needs to build AMIs. This is done by attaching the appropriate policy to the Packer role, which can be cut/past from the policy outlined in Packer’s AWS AMI builder documentation.

  4. Generate dynamic credentials in AWS that will provide access to Packer to generate an AMI.

  5. Revoke the credentials at any time.

If so inclined, these same series of steps can be performed via the Vault command line.

Build Your AMI Using PACKER With Dynamic AWS Credentials

Now that we have the Vault and AWS integration working we are ready to utilize the dynamic credentials in our Packer build. We will leverage Packer’s user variables to pass in our dynamic secrets by means of a variable file called awskeys.json.

vault_packer_build.gif


  1. Generate a set of dynamic credentials for Packer within Vault.

  2. Save credentials to a variable file called awskeys.json. Vault provides these in JSON format which is what Packer expects.

    {
      "accessKey": "AKIAIMQUVKMCSRB5NEZA",
      "secretKey": "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",
      "leaseId": "aws/creds/packer/1pf3nMh8KEEJtQQGADFtGYAE"
    }
  3. Specify the correct variable names in the packer build template. The builder stanza of my packer template for creating a vBrisket AMI looks like:

    {
      "builders": [{
        "access_key": "{{ user `accessKey`}}",
        "secret_key": "{{ user `secretKey`}}",
        "type": "amazon-ebs",
        "region": "us-east-1",
        "source_ami": "ami-0f9cf087c1f27d9b1",
        "instance_type": "t2.medium",
        "ssh_username": "ubuntu",
        "ami_name": "vbrisket-image {{timestamp}}",
        "ami_description": "vBrisket Image",
        "ami_groups": ["all"]
      }]
    }

Run a Packer build specifying the variable and template file:

packer build -var-file=awskeys.json vbrisket.json

Vault will automatically expire or rotate these credentials based on their lease time so there is no harm for me to show you my credentials as they will be revoked and become utterly useless after they have served their purpose. This workflow can be further automated utilizing consul-template and/or envconsul but that is a subject for a different post. Happy building (securely).

Moving Your Fleet from AWS to AZURE with Terraform

In the series of Terraform posts we have shown how to effectively utilize Infrastructure as Code to build, deploy, scale, and monitor a fleet of infrastructure across both AWS and Azure. The beauty of Terraform is that we can leverage providers to execute the entire deployment in a consistent way across clouds regardless of the particular constructs. The particulars (API interactions, exposing resources, dependency mapping, etc.) are taken care of by Terraform and the providers themselves.

To recap this is what we have covered so far:

Now that we have our fleet in both AWS and Azure, let’s move between them.

Moving Fleet between AWS and Azure

Below are the respective fleets in both AWS and Azure.

havaawsdev.png
HavaIOAzure.png

Having presence in both we will need to redirect our traffic to our cloud of choice. This is easily done via DNS. The Terraform output from our AWS and Azure deployments via Terraform provides us with the public facing DNS names for each of the respective environments. These are the same DNS names that we have used to validate our deployments in each of the given clouds during the previous steps.

AWSDNSName.png
AzureDNSName.png

We can then log into our DNS provider/management service (mine happens to be with Hover) and create three CNAME records. azure, aws and www. The domain name I will be using to access our fleet is couchtocloud.com

DNS.png

The aws and azure records are not necessary but I like to be able to browse to them directly for troubleshooting if necessary.

HelloMultiCloud.png

The www record can then be pointed at which ever cloud you want to traffic to be directed to, and modified to point to a different cloud when needed. We can now dictate which cloud we want to send traffic to with a simple DNS update. For a simple form of load balancing between the clouds you can create two www records, one pointing to aws and the other to azure. Requests will then round robin between the two clouds.

HelloMultiCloudWWW.png

Wrapping Up

And that is a wrap for this series where we showed how to use Terraform to build out environments both in AWS and Azure and move between the two. Terraform is extremely powerful and I further encourage you to learn more on how it can be used for enabling you to safely and predictably create, change, and improve infrastructure.

How to Visualize Your Cloud Deployments - Hava

This is the third in a series of posts highlighting tools I have found particularly useful for visualizing AWS and Azure, including:

In this post we will take a look at Hava - https://www.hava.io/

Hava

Hava is a web based service that produces automated diagrams of your existing infrastructure and network topology in both AWS and Azure. Diagrams are created by connecting to your AWS and Azure accounts via a read only user account, that securely gathers all items in a VPC or Resource group. Connections, security groups, cost estimates are all things that Hava diagrams provide. Below is a simple diagram of an AWS deployment.

prod_diagram.png

Azure Support

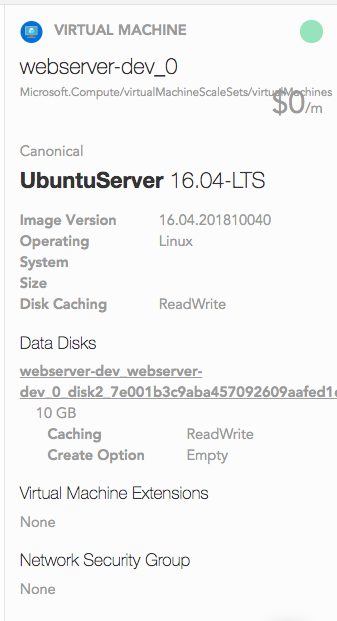
Unlike other visualization tools, Hava supports both AWS and Azure deployments. Resources of a given Azure resource group are diagramed and their details are provided. Azure diagraming supports versions which allow you to look a differences within a given resource group over time. Below is a diagram of an Azure deployment.

HavaIOAzure.png
havaversions.png
havadetails.png

Benefits:

  • Of the three visualization tools compared in this series, Hava is the only one that supports both AWS and Azure. I really like the flexibility to diagram both, as it helps show case multi-cloud deployments.

  • Hava provides not only infrastructure diagrams but also includes a security view for it’s Professional users. This is helpful to visualize security group interactions.

  • Excellent support. As I have been using Hava, I have run into a few snags with the live updates. I was very pleased with the level of support provided to correct the issues. In fact the website provides a chat window so talk directly with support to get questions/issues answered. Kudos to the Hava team, and in particular Adam for his help.

havasupport.png

Nice to Haves:

  • I have found the pricing of Hava to be out of many’s price range. To get the infrastructure and security views, which I believe is one of Hava’s biggest benefits, the cost is $99/month. This is double the price of the other offerings. If you strip out the security components they do have a $49/month offer which is reasonable for being able to diagram both AWS and Azure deployments.

  • Azure support is there, but currently feels like a second class citizen. AWS resources and diagrams are more robust and security views are not yet available for Azure.

Below is a cost model for the different Hava subscription levels.

Havacosts.png

Building the Fleet in Azure with Terraform

In the series of Terraform posts we have shown how to effectively utilize Infrastructure as Code to build, deploy, scale, monitor and destroy a fleet of infrastructure across multiple regions in AWS. The beauty of Terraform is that while we may have used it to build out infrastructure in AWS, we can also extend it’s use to other cloud providers as well. As I see more and more organizations adopting a multi-cloud strategy, let’s take a look at what it would take to deploy our fleet into Azure.

Azure Specifics

If you are familiar with AWS, Azure provides many similar services and features. The Azure Terraform provider is used to interact with many of the Azure resources supported by Azure Resource Manager (AzureRM). A brief overview of the Azure resources will will utilize to move our fleet to Azure are:

Azure Authentication: Terraform supports authenticating to Azure through a Service Principal or the Azure CLI. A Service Principal is an application within Azure Active Directory whose authentication tokens can be used as the client_id, client_secret, and tenant_id fields needed by Terraform. Full details to create a service principle are well documented on the Terraform website.

Resource Group: Azure holds related resources for a given solution in a logical container called a Resource Group. You cannot deploy resources into Azure without assigning them to a Resource Group which we will create and manage via the Terraform Azure provider.

Virtual Network: Akin to a AWS VPC, Azure’s Virtual Network provides an isolated, private environment in the cloud. It is here where we will define our IP address range, subnets route tables and network gateways. This build will utilize the Azure network module maintained in the Terraform module registry.

Scalability: In order to scale our fleet to the appropriate size, Azure provides Azure’s Virtual Machine Scaling Set (VMSS). AWSS is similar to AWS Auto Scaling allowing us to create and manage a group of identical, load balanced, and autoscaling VMs. The fleet will be front ended by a load balancer so that we can grow/shrink without disruption and will utilize VMSS module up on my GitHub terraform_azure repository.

Deploy to Azure

For our initial Azure deployment will will create a new set of Terraform files, including a new main.tf to tie together the details of the Azure provider, modules and specifics for how we want to the fleet built. Inside the file we have declared our connection to Azure, the resource group to build, the virtual network details as well as the web server cluster. The VMSS module referenced also builds a jump server/bastion server in the event that you need to connect to the environment to do some troubleshooting. I have specified my Azure credentials as environment variables so that they are not included in this file.

All files to create this fleet in Azure including the main.tf, output.tf and VMSS module are available in the terraform_azure repository of my GitHub account.

We can initialize, plan and apply our deployment using Terraform and immediately see our Azure resources being built out through the Azure Portal and inside our devtest resource group.

azurefleet.png
azureapplycomplete.png

Once the deployment is complete, we browse to the DNS name assigned to to the load balancer front ending our Azure VMSS group. This address displayed at the end of the Terraform output, as we included an output.tf file to list relevant information.

Browsing to the DNS name we can validate our deployment is now completed. At this time we can check the health of the deployment - remember there is a jump server that is accessible if needed.

hellofromAzure.png

Once you are happy with the state of the new fleet in Azure it can be torn down with a terraform destroy. I recommend doing this as we prepare for the next step in the series: Moving the Fleet from AWS to Azure.

This is part of a Terraform series in which we have covered: