Moving Your Fleet from AWS to AZURE with Terraform

In the series of Terraform posts we have shown how to effectively utilize Infrastructure as Code to build, deploy, scale, and monitor a fleet of infrastructure across both AWS and Azure. The beauty of Terraform is that we can leverage providers to execute the entire deployment in a consistent way across clouds regardless of the particular constructs. The particulars (API interactions, exposing resources, dependency mapping, etc.) are taken care of by Terraform and the providers themselves.

To recap this is what we have covered so far:

Now that we have our fleet in both AWS and Azure, let’s move between them.

Moving Fleet between AWS and Azure

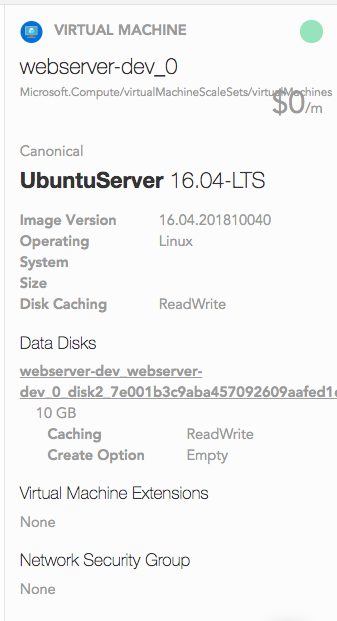
Below are the respective fleets in both AWS and Azure.

havaawsdev.png
HavaIOAzure.png

Having presence in both we will need to redirect our traffic to our cloud of choice. This is easily done via DNS. The Terraform output from our AWS and Azure deployments via Terraform provides us with the public facing DNS names for each of the respective environments. These are the same DNS names that we have used to validate our deployments in each of the given clouds during the previous steps.

AWSDNSName.png
AzureDNSName.png

We can then log into our DNS provider/management service (mine happens to be with Hover) and create three CNAME records. azure, aws and www. The domain name I will be using to access our fleet is couchtocloud.com

DNS.png

The aws and azure records are not necessary but I like to be able to browse to them directly for troubleshooting if necessary.

HelloMultiCloud.png

The www record can then be pointed at which ever cloud you want to traffic to be directed to, and modified to point to a different cloud when needed. We can now dictate which cloud we want to send traffic to with a simple DNS update. For a simple form of load balancing between the clouds you can create two www records, one pointing to aws and the other to azure. Requests will then round robin between the two clouds.

HelloMultiCloudWWW.png

Wrapping Up

And that is a wrap for this series where we showed how to use Terraform to build out environments both in AWS and Azure and move between the two. Terraform is extremely powerful and I further encourage you to learn more on how it can be used for enabling you to safely and predictably create, change, and improve infrastructure.

How to Visualize Your Cloud Deployments - Hava

This is the third in a series of posts highlighting tools I have found particularly useful for visualizing AWS and Azure, including:

In this post we will take a look at Hava - https://www.hava.io/

Hava

Hava is a web based service that produces automated diagrams of your existing infrastructure and network topology in both AWS and Azure. Diagrams are created by connecting to your AWS and Azure accounts via a read only user account, that securely gathers all items in a VPC or Resource group. Connections, security groups, cost estimates are all things that Hava diagrams provide. Below is a simple diagram of an AWS deployment.

prod_diagram.png

Azure Support

Unlike other visualization tools, Hava supports both AWS and Azure deployments. Resources of a given Azure resource group are diagramed and their details are provided. Azure diagraming supports versions which allow you to look a differences within a given resource group over time. Below is a diagram of an Azure deployment.

HavaIOAzure.png
havaversions.png
havadetails.png

Benefits:

  • Of the three visualization tools compared in this series, Hava is the only one that supports both AWS and Azure. I really like the flexibility to diagram both, as it helps show case multi-cloud deployments.

  • Hava provides not only infrastructure diagrams but also includes a security view for it’s Professional users. This is helpful to visualize security group interactions.

  • Excellent support. As I have been using Hava, I have run into a few snags with the live updates. I was very pleased with the level of support provided to correct the issues. In fact the website provides a chat window so talk directly with support to get questions/issues answered. Kudos to the Hava team, and in particular Adam for his help.

havasupport.png

Nice to Haves:

  • I have found the pricing of Hava to be out of many’s price range. To get the infrastructure and security views, which I believe is one of Hava’s biggest benefits, the cost is $99/month. This is double the price of the other offerings. If you strip out the security components they do have a $49/month offer which is reasonable for being able to diagram both AWS and Azure deployments.

  • Azure support is there, but currently feels like a second class citizen. AWS resources and diagrams are more robust and security views are not yet available for Azure.

Below is a cost model for the different Hava subscription levels.

Havacosts.png

How to Visualize Your Cloud deployments - Cloudcraft

This is the second in a ‘series’ of posts highlighting tools I have found particularly useful for visualizing AWS and Azure, including:

In this post we will take a look at Cloudcraft.

Cloudcraft

Cloudcraft is an online diagraming tool that allows you to both create diagrams through a designer interface and also pull in live inventory from AWS via a secure connection. Cloudcraft is all in on AWS. In fact if you are doing a fair amount of work in AWS there is a good chance you are already familiar with Cloudcraft, but if not it is worth checking out. I liken their designer as a “Visio on Steroids” for AWS. The design below was built using the CloudCraft visual designer to illustrate a web app deployment on AWS.

cloudcraft_designer.png

Within the designer you can perform a search to highlight AWS components including a region, tag, or component name. Below we are highlighting all components in the us-east-1 region. This search could be refined for example to show all EC2 instances within the us-east-1 region tagged for production.

cloudcraft_designer_tags.png

In addition to visualizing the deployment, Cloudcraft also offers a pretty impressive budget feature. This breaks down the anticipated cost and allows you to modify the design by exploring different compute, database, storage and networking sizes broken down by cost. When making changes within the budget view your design is automatically updated to reflect the updates. You can also export your design as a PDG for PNG, as well as share via a link to others on your team.

cloudcraft_budget.png

Once deployed, Cloudcraft offers a ‘Live’ mode as part of the professional subscription which allows you to discover and import your AWS inventory into the designer view. Below is the Cloudcraft visualization of the web application deployment highlighted in several of my Terraform posts.

cloudcraft_live.png

Benefits:

  • Allows you to produce an architecture diagram without any need for deployment. After all, sometimes we just want to diagram things without actually deploying them.

  • The web interface is really spectacular. Cloudcraft in my opinion has the best looking 3D and 2D (with integration to draw.io) diagrams, which I find useful for presentations, papers and web posts.

  • Pricing Breakdown: Cloudcraft is completely free for single users to design and save an unlimited number of private diagrams. This includes designer, cost calculations, design documentation and export. The Live features are included in the Pro version along with team collaboration and support which is currently listed as $49/month. For a complete pricing/feature break down check out CloudCraft’s pricing guide.

Nice to Haves:

  • The auto-layout within the ‘Live’ import can be a little clunky and sometime hard to manage. Based on some reading, Cloudcraft recognizes this and has start to improve their auto-layout algorithms.

  • Support only for AWS, it would nice to be able to see support for other clouds (Azure, GCP, etc.)

Remembering to Clean Up with Terraform

One of my favorite uses of Terraform is to quickly turn up an infrastructure environment with only a few lines of code. Of equal importance is the ability to tear down parts of the environment when they are no longer needed or need to be rebuilt. Terraform helps me leverage elasticity both in building, destroying and rebuilding as necessary.

Reminders

If you are like me, you tend to forget things and need reminders. I have been building out environments now for some time in an automated way, but I am not always the best at remembering to tear them down when I am done. Don’t get me wrong, the act of tearing things down is easy with commands like terraform destroy, but remembering to do so is where I have a gap.

To close that gap I wanted to create a monitoring and trigger mechanism that would remind me when my infrastructure is running idle, and to go clean it up. Since many of my deployments are in AWS, the two tools I will leverage to accomplish this are CloudWatch and SNS. For those not familiar, CloudWatch is a monitoring and management service provided by Amazon that provides operational metrics on the health of a given environment. SNS is a notification service that allows you to send messages to a variety of endpoints - including SMS text messages which is a great way to remind me of doing things.

Incorporating Monitoring into My Build

Defining CloudWatch and SNS is relatively easy in Terraform as both resources can be defined using the Terraform AWS provider. Examples for both can be found on the Terraform website, and I have folded them both into a module I created on GitHub.

We will use these resources to monitor when the our autoscaling group goes idle, which I define as less then 2% CPU every minute for 5 minutes. When that occurs send a text message to the supplied phone number. To keep it simple the module accepts both the autoscaling group to monitor and the phone number to send messages to as variables. There is nothing preventing us from also defining the thresholds and polling intervals as variables as well, and in fact is something that we should probably do in the future to make the module more robust.

Using the Cloud-Watch Module

To make use of this module, we simply need to edit the main.tf file we have been using in development to include the cloud-watch module, which we will call from GitHub. We will pass the name of the auto scaling group created within the webserver_cluster module as an input for monitoring and prompt for the phone number to send the alert message to.

Now when we deploy our fleet there will be a two cloud watch alarms created against the deployed auto-scaling group. One that will report on idle time in a 5 minute window, and the other reporting on idle time in a 5 hour window. The idea being that if I missed one text message, I will get the second so that I can perform a terraform destroy to tear down the environment when it is not being utilized.

Now that I have included the cloud-watch module to my development main.tf file let’s initialize (terraform init), plan (terraform plan), and deploy (terraform apply).

Notification and Clean UP

I can see that it successfully created my alarm in CloudWatch and tied it to the auto-scaling group it created when deploying the fleet.

Output from running a terraform apply, listing the DNS name and autoscaling group of the sever fleet.

Output from running a terraform apply, listing the DNS name and autoscaling group of the sever fleet.

CloudWatch Alarm - Two were created, one for 5 minute intervals and the other for 5 hour intervals.

CloudWatch Alarm - Two were created, one for 5 minute intervals and the other for 5 hour intervals.

Now when the environment goes idle, an alarm will trigger and send me a text message. Should I not take care of it at that time, another text message in 5 hours will be send should the environment remain idle.

Text Message from AWS SNS notifying me that my auto-scaling group has had idle CPU for the last 5 minutes.

Text Message from AWS SNS notifying me that my auto-scaling group has had idle CPU for the last 5 minutes.

Since Terraform makes it easy to cleanup (terraform destroy), I will be sure to perform that step to not incur costs for unused assets and environments. Terraform destroy will be sure to cleanup not only the environment it deployed but also the alarms and SNS notifications it created during buildout.

This is part of a Terraform series in which we have covered: